Your LED strips, Octo, ELM software, and wiring installation are all set. However, when you power it up, the LED strips light up but cannot be controlled, and at times, they flicker or fail to display the desired light color, or worse, not lighting up at all.
The reason the LED strips is uncontrollable is due to the Octo's misconfiguration. Here is the instruction/procedure on configuring your Octo:
OCTO Configuration:
1. Open browser, and type in the Octo's ip address in the address bar and press enter. (Default ip address of Octo is 192.168.0.10).

2. Click Settings, on the Output Settings Section, click on the Output 1 and or Output 2 field and choose the Pixel Protocol according to the personality of your strip. (Please refer to your strip's Data Sheet).


3. On the Color Order field, choose the corresponding order according to the personality of your strip. (Please refer to your strip's Data Sheet).

4. On the Pixel Mapping Options section, choose your Input Protocol (Artnet or sACN or ESP or Kinet).

5. Fill the total number of Universes you want to use, and specify which number of Universe as starting universe for the Output 1, and which number of Universe as starting for the Output 2. Click Save.

6. Open ELM, click New Stage, then Ok. Click Add Strips.

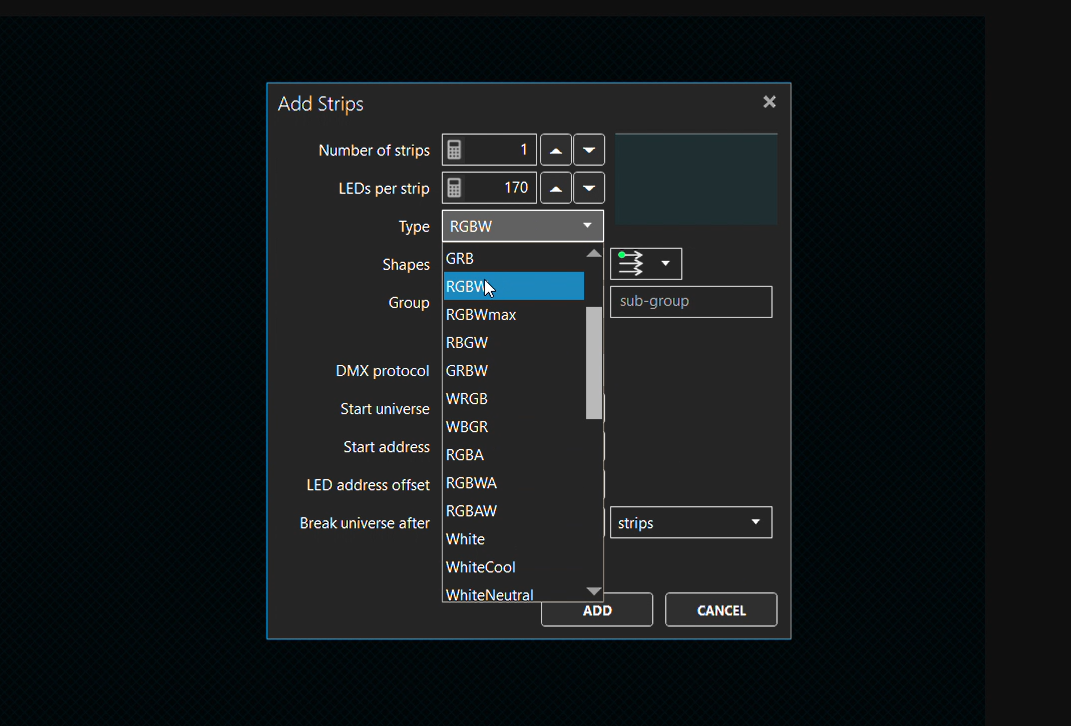
7. Specify the Number of Strips and how many LEDS per strip. On the Type section, choose the Color Order of your strip's personality.


8. On the DMX Protocol section, choose the Input Protocol same as what you've set in the Octo's configuration. ((Artnet or sACN or ESP or Kinet).

9. Specify the Start Universe number same as as what you've set in the Octo's configuration.

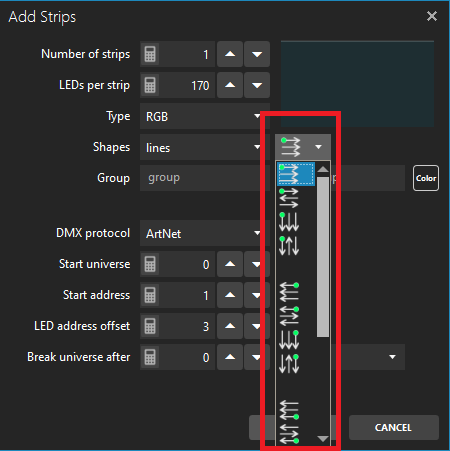
10. Choose the correct Strip direction based from how you design the layout of your strip installation.

11. Click Add.

11. From here, you can now start mapping up your LED strip in your ELM Software.
For more details about mapping up your LED Strip in ELM, kindly refer to our YouTube videos on the link below:
